Repasemos lo que hemos hecho hasta ahora.

Nos hemos currado una plantilla para usar ya hasta el fin de los tiempos.
Hemos cortado la pieza de cuero gracias a la plantilla.
Hemos sumergido el cuero en agua caliente.
Hemos puesto el cuero en un molde y lo hemos dejado secar.
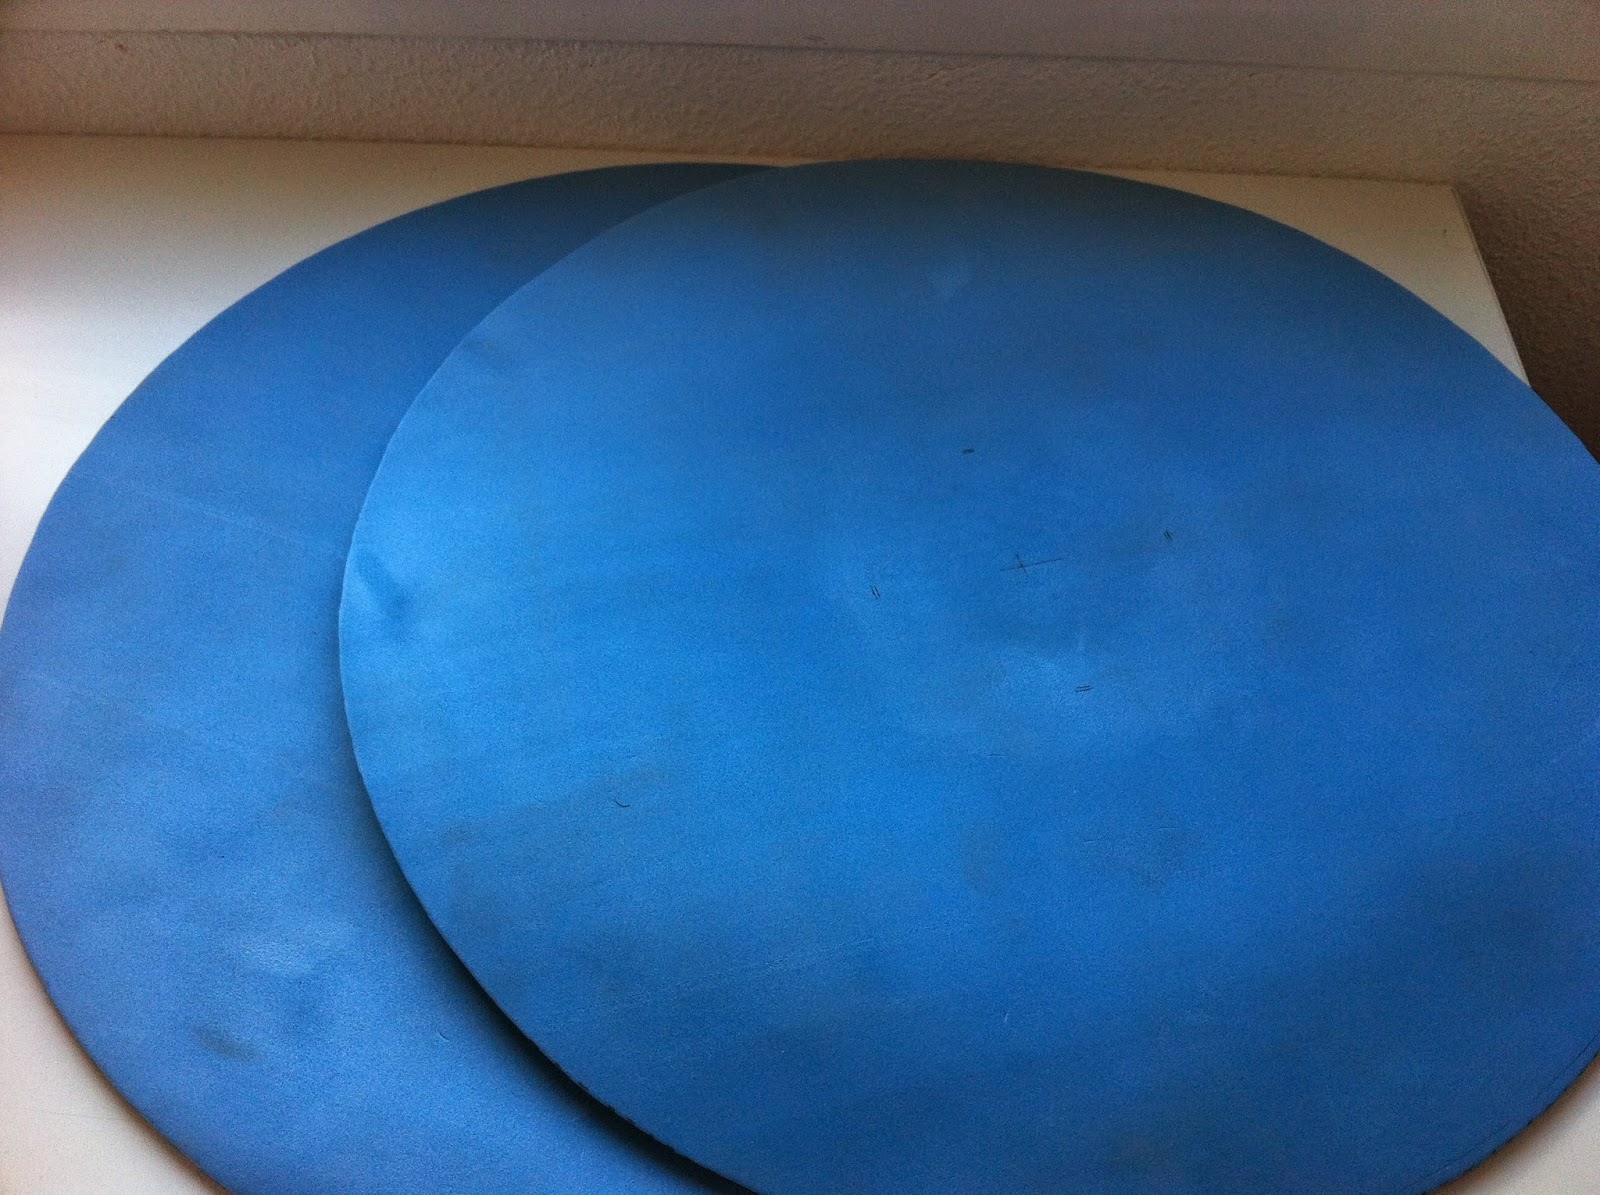
Ahora tenemos la pieza de cuero en su forma y tamaño adecuados.
Let's check what we have done so far.
We have created a template for using it until the end of times.
We have cutted the leather piece thanks to the template.
We have soaked the leather in hot water.
We have putted the leather on a mold, an let it dry.
Now we have the piece in it's correct shape an size.
¿Que nos falta?/What is missing?
-Sistema de agarre
/ Grip system
-Remaches
/ Rivets
-Toque final
/ Final touch
Vayamos con lo primero, el sistema de anclaje.
Let's go with the first part, the grip system.
.JPG)
La verdadera Greba, realmente era una pieza que cubría toda la pierna, por delante y por detrás, esto es más bien una espinillera. Lo suyo hubiera sido tener cuero de sobra para hacer la pieza trasera... quizás algún día.
Lo que sí se hacía era usar un sistema de correas, las que seguramente usaban algún tipo de hebilla.
Intentando que sea lo más fiel a la recreación, pero sin dejar de ser cómodo y aprovechando las ventajas de la metalurgia moderna, he optado por usar 3 correas con hebillas de unos 2 cm de ancho, eso significa unas tiras con un ancho ligeramente menor 1,5 cm aproximadamente.
En la foto podéis ver las 6 hebillas con sus tiras preparadas
The real greave, was a armor piece that covered all the leg, front and back, this is more likely a shinguard. If I had more leather for the back part... maybe some day.
What they did have, was a strap system, probably with the use of some buckle.
Trying to get it to be, as realistic as possible, but keeping in mind to make it confortable, and taking advantage of the modern metallurgy, I decided to use 3 strips with buckles, about 2 cm width, that meas that the strips have to be slighty smaller, about 1,5 cm.
In the picture you can se the 6 buckles with the strips ready.

Como apenas estoy dando datos técnicos, comentaré un par de cosas. La primera, encontrar 6 hebillas iguales me ha sido imposible, por lo que he comprado 2 de cada, así cada greba tendrá un juego de 3 hebillas distintas, colocadas de arriba a abajo, de mayor a menor tamaño.
El sistema de anclaje para las hebillas es con remache, iba a coserlas, pero decidí ahorrar tiempo.
Para que os hagáis una idea de como hacer la pieza de las hebillas os dejo este esquema.
I'm barely telling technical data, lets talk about a couple of things. First, finding the 6 same buckles was impossible, so I bought 2 of a kind, so each grave will have a full set of 3 different buckles, located from above to bottom, from bigger to smallest.
The grip system for the strips is made with rivets, I was going to sew it, but I decided to save time.
This drawing is made so you can get an idea for doing the buckle pieces.
Básicamente cogemos una tira de cuero, de unos 7 cm de largo, y lo dividimos en 3 partes iguales.
En una parte dejamos 2 huecos para agarrarlo a la greba (mejor 2 que 1).
En las otras dos partes hacemos dos agujeros SIMETRICOS, para el remache que sujetará la hebilla, y una pequeña perforación para pasar la punta de la hebilla.
Basically we take a leather strip, about 7 cm long, and divided in 3 equal parts.
On one side we leave 2 holes for graping it to the grave (better 2 than 1).
On the other to parts, me make two SIMETRICAL holes, for the rivet that is going to hold the buckler, and a little hole for the pin of the buckler.
Para las tiras restantes de agarre, basta con hacer unas tiras relativamente largas, con unos 15 cm, ya tendrías suficiente, una vez más en un lado 2 perforaciones, y el otro acabado en punta para que entre mejor en las hebillas.
Para las perforaciones de anclaje con una separación de 1 cm aproximadamente suficientes, eso sí. haz bastantes por si las moscas.
For the remaining strips, just make some long strips, about 15 cm should be enough, once again, 2 holes on one side, and the other ended pointed, so it can fit better into the buckler.
For the gripping holes, a separation of 1 cm, should be enough, but make a lot of them just in case.
Las tiras de agarre deberían tener dimensiones diferentes, así la del tobillo con unos 8 cm debería ser suficiente, la del gemelo unos 12-14, y la de la rodilla unos 18-20. Una vez más, dependiendo de como sea tu pierna tendrás que variar esas dimensiones, ese es el motivo por el cual no hay imágenes de las tiras en los patrones que he subido.
The gripping strips should have different lenghts, the ankle one could be a 8 cm long, for the calf about 12-14, and the knee about 18-20. Once again, depending of your leg size you'll have to change this dimensions, this is the reason why there are not strips images on the templates.
Tengo que decir que en esta foto las tiras están SOBRE dimensionadas, para que valgan más o menos para todo el mundo.
I have to say that in this picture, the strips are OVER sizes, so it can fit to allmost everybody,
Los remaches/rivets
Bueno, aquí vamos a tener algún problema con más de uno.
El sistema tradicional de remaches, debería ser una pieza de latón, cobre o hierro, que sea fácilmente moldeable con un martillo pequeño. Creo recordar que existen hasta remaches de rosca, pero nunca los he usado.
I fear we are going to have some problems with some people.
The traditional rivet way, should be a brass, copper, or iron pieces, easily molded with a small hammer. I think there are even nut rivets, but I've never used them.
Sin embargo, no tengo muchas ganas de ponerme a dar martillazos, principalmente porque ya lo hice en su día para mis hombreras, y tiene su dificultad para que quede bien y además se tarda bastante.
anyway, I don't feel like hammering, especially because I did it once with my pauldrons, and it requieres some effort to make it right, and it takes quite some time.
Es por ello, y no quiero animar a nadie a que lo haga igual que yo que he usado remaches de estiramiento (creo que se llaman así).
Si bien estoy seguro que no es la mejor forma de hacerlo, y por supuesto no tiene ningún rigor histórico, el tiempo que te ahorras es brutal.
Usa un simple sacabocados, y una remachadora y en un momento lo tienes terminado.
This is why, and I don't want to encourage anybody to do it the same way as I did, that I used strecht rivets (I think they are called that way).
I'm certain that this is not the best way of doing this, and of course it has no historical rigour, but the time you are going to save, it's totally worth it.
Just use a simple puncher, a rivet gun, and you'll have it done in no time.
Una vez más, si lo que quieres es rigor histórico, no uses estos remaches, yo solo quiero que ahorres tiempo.
Once again, if you want historial rigour, don't use this rivets, I just want you to save some time.
El toque final /The final touch
El toque mágico que hará que las grebas parezcan de calidad suprema, y además le dará una protección extra contra el agua.
The magic touch that will make the greaves to look high quality, and also will add an extra protection against water.
Betún de judea:
/ bitumen
El betún de judea es un tinte que se usa ampliamante en restauración para dar un aspecto envejecido, sirve tanto para madera, metal, cerámica, cuero, e incluso lo he llegado a usar en alguna miniatura.
Es un producto asfáltico, así que cuidado con respirar los vapores, abre bien las ventanas, y aplica el betún a tu gusto.
Según el nivel de envejecido que quieras darle, puedes usarlo directamente, o diluyendo el betún en aguarrás, a tu gusto.
Betún de judea (bitumen) is a dye used on restoration for adding an old look it's used on wood, metal, ceramic, leather, I even used it on some miniature.
It's an asphalt so take care not to inhalate the vapours, open your windows, and apply the bitumen at your will.
depending on the age level you want to have, you can use it directly, or thin it with turpentine, your way.
Apenas se ve porque ya era de noche y tenía poca luz, pero aquí ya estaba aplicando el betún, ¿notáis la diferencia de color?, yo lo he rebajado muy poquito con aguarrás, a ojo, no puedo decir cuanta cantidad exactamente.
Lo bueno de esto, es que además le añades una ligera capa que evitará que se moje demasiado (seguirá mojándose claro, pero un poco menos).
You can barely see it since it's was midnight, but I was already using the bitumen, can you notice the difference of colour?, I thin not much with turpentine, but at my own, can't tell the exact amount.
The cool thing, is that you also add a light layer that will avoid it to get wet (it still can get wet, but a little less).
Lo suyo tendría que haber sido aplicar el betún ANTES de poner las correas, pero en ese momento estaba convencido de dejar el cuero sin betún, no fue hasta que tuve las grebas terminadas que decidí darle el tinte, y la verdad es que han quedado mucho más bonitas después.
Y eso es todo, un trabajo muy sencillo, que no requiere demasiado esfuerzo, y con un resultado bastante satisfactorio, me ha encantado trabajar con cuero por primera vez, y estoy seguro de que no será la última.
The right way of doing this, should have to used the bitumen BEFORE adding the stripes, but I was convinced in that time, to leave the greaves without bitumen, It was not until I had everything finished that I wanted to use the dye, and I must say that they ended looking pretty cool.
And that's all, a really easy job, not much effort requiredm and a rather good result, I loved working with leather for the first time, and I'm sure it won't be the last.
*(Si en la mesa de trabajo tienes unas tijeras rosas, y bisutería de colores para niñas trabajas MUCHO mejor XD)
*(If you have pink scissors, and imitation jewery for girls on your work bench you work MUCH better XD)
Parte 1
Parte 2


.JPG) La verdadera Greba, realmente era una pieza que cubría toda la pierna, por delante y por detrás, esto es más bien una espinillera. Lo suyo hubiera sido tener cuero de sobra para hacer la pieza trasera... quizás algún día.
La verdadera Greba, realmente era una pieza que cubría toda la pierna, por delante y por detrás, esto es más bien una espinillera. Lo suyo hubiera sido tener cuero de sobra para hacer la pieza trasera... quizás algún día. Como apenas estoy dando datos técnicos, comentaré un par de cosas. La primera, encontrar 6 hebillas iguales me ha sido imposible, por lo que he comprado 2 de cada, así cada greba tendrá un juego de 3 hebillas distintas, colocadas de arriba a abajo, de mayor a menor tamaño.

.JPG)
.JPG)